How-to6 min readSeptember 21, 2026
How to add virtual try-on to a Shopify store in an afternoon. No theme code.
Install an app, switch on the theme embed, check your size charts, test on a phone, and watch the first week of data. Five steps, no developer, no 3D models, and the mistakes that cost merchants their first month.
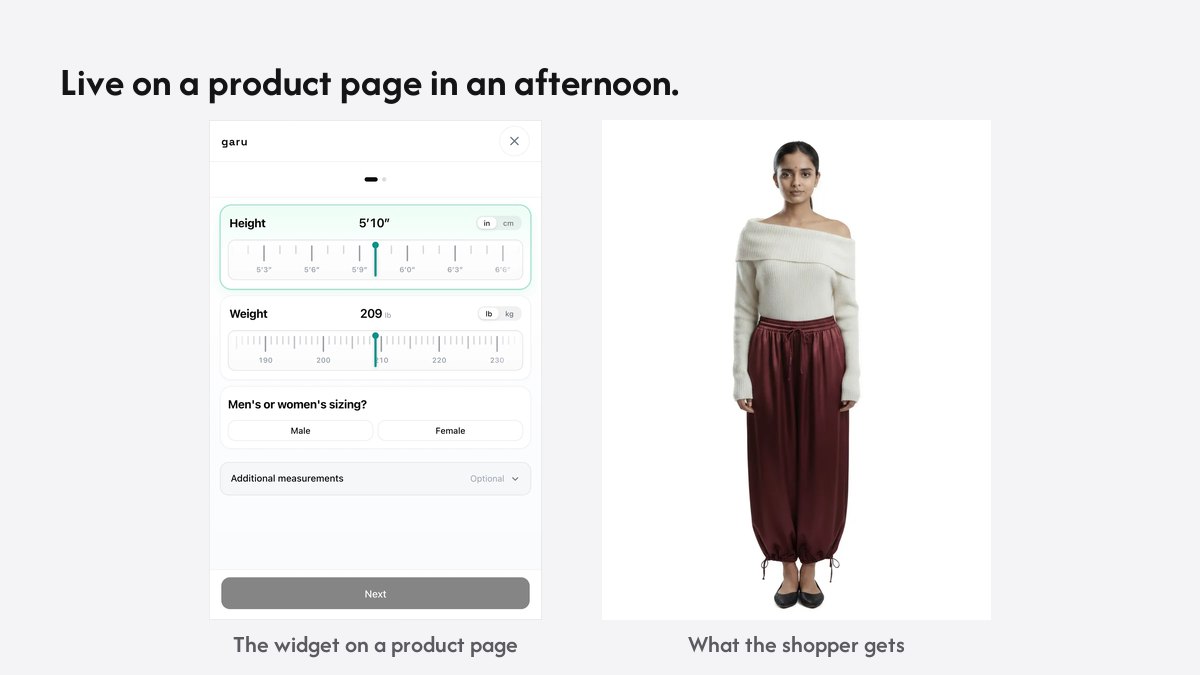
Adding try-on to a Shopify store used to mean a developer, a theme fork and, for some vendors, 3D models of every product. It now means installing an app and switching on an embed. The technical part takes minutes. The part that decides whether it works is the preparation around it, and that is what this guide is about.
Step 1. Install the app
Install Garu from the Shopify App Store and choose a plan. The free plan gives you 25 try-ons a month, which is enough to test on real shoppers. Every paid plan starts with a 14-day trial and no card. The app asks for the permissions it needs to read products and, if you enable attribution, orders. It does not touch your theme files.
Step 2. Switch on the embed
Open the theme editor, go to App embeds, and turn on Garu Try On. The try-on button appears on your product pages in the position the app chooses for your theme. Do this on a duplicate of your live theme first: you can preview the result and only publish it when you are happy. Switching the embed off later restores the page exactly as it was.
Step 3. Check your size charts
This is the step merchants skip, and it is the one that makes the difference between a picture and an answer. A size recommendation matches the shopper’s measurements against the garment’s chart. If the chart says only S, M and L with no numbers behind them, there is nothing to match. Make sure every product you will enable has a chart with real measurements: chest or bust, waist, hips, and inseam for trousers. Garu reads the charts you already have on the product; you do not re-key them.
If your garments run differently from their chart, say so in the fit note. A shopper told “this runs small, order up” before they choose is a shopper who does not return it.
Step 4. Test on a phone with a real photo
Most try-ons happen on a phone, so test there. Take a full-length photo of yourself in a doorway or against a wall, open a product page, and run the try-on. Look at the front, then the back. Check the size it recommends against what you would actually order. Then try a product at the edge of your range: an oversized knit, a long dress, a tailored jacket. If the result would not convince you, do not ship it, and tell the vendor what you saw.
Step 5. Start narrow, then read the data
Turn the button on for five products first: the ones with the highest size-related returns, or the ones shoppers hesitate over most. Watch a week of try-ons, sizes recommended, and add-to-cart. Garu’s dashboard shows which products get tried on and what shoppers did next. When the numbers look right, expand to the categories that fit varies in, and leave it off accessories and products without a size, where it adds little.
The mistakes that cost a first month
- Turning it on everywhere on day one. You cannot tell what changed. Five products and a week of data will.
- Charts without numbers. A recommendation cannot come from S, M, L alone. This is the most common reason a size finder “does not work”.
- Testing only on desktop. The photo upload, the button placement and the result all behave differently on a phone, which is where the shopper is.
- Not telling shoppers about photos. Say what happens to the photo. Garu deletes shopper photos within 24 hours and never trains on them; a line saying so next to the button removes the last hesitation.
Once the widget is live, the next question is what to put on the product page around it. Ten changes that move an apparel product page covers that.
Questions merchants ask
Do I need a developer to add virtual try-on to Shopify?
Not with an app that uses Shopify’s theme app extensions. Garu installs from the App Store and appears as a toggle in the theme editor. No theme files are edited, and switching it off restores the page as it was.
Do I need 3D models of my products?
No. Image-based try-on works from the product photos you already have. The model reads the garment from the product page image and renders it on the shopper.
Which products should I enable first?
The ones with the most size-related returns, and the ones shoppers hesitate over. Dresses, tailoring, denim and anything with a fit that varies by size. Accessories and products without a size gain little.
How long does setup take?
Installing and switching on the embed takes minutes. Checking size charts and testing on a phone is the real work, and an afternoon covers it for a catalogue of a few hundred products.